Drive System/'s
ALL DrivesBattery Type/'s
-Lithum 200AH 3.3KW Charger-Lithum 200AH 3.3KW Charger
HVAC System/'s
All HVACManufacture Dates
Between 07/13/2015 Thru 12/31/2024
These are the instructions on how to recharge battery pack when pack voltage is too low. Lithium battery management system (BMS) has a low voltage threshold. Once any single cell drops below 1/2-volt threshold the BMS will not allow the battery charger to operate. This voltage is measured by reading the voltage over each of the individual 24 cells within the battery pack. If you have the lithium diagnostic cable and a computer, you can connect it to the diagnostic port above the accel pedal and it will show you the voltages of each cell.
This will require a separate 12-volt battery charger. Place your battery charger setting on 12VDC. Amperage not to specific. High the faster this process will go. Typically, don't want anything higher than 60 amps.
The main goal is to get the voltage of each cell above the threshold of the BMS. Each cell has a nominal voltage of 3.2 volts DC. You are just trying to get energy back in them so the voltage of the cells will rise. It is crucial that the battery pack stays balanced. Don't charge some cells for say 20 minuets and others for 10 minutes. Try and be consistent.
Note that the battery cables do not need to be disconnected. Everything can stay just as it is. For added safety you can turn the main battery disconnect off in the front right wheel well. Also, these are quantity 2 100AH cells making up a 200AH cell. So, they 2 x 100AH cells are wiring in parallel. The pack itself is in series making up a nominal 72-volt system.
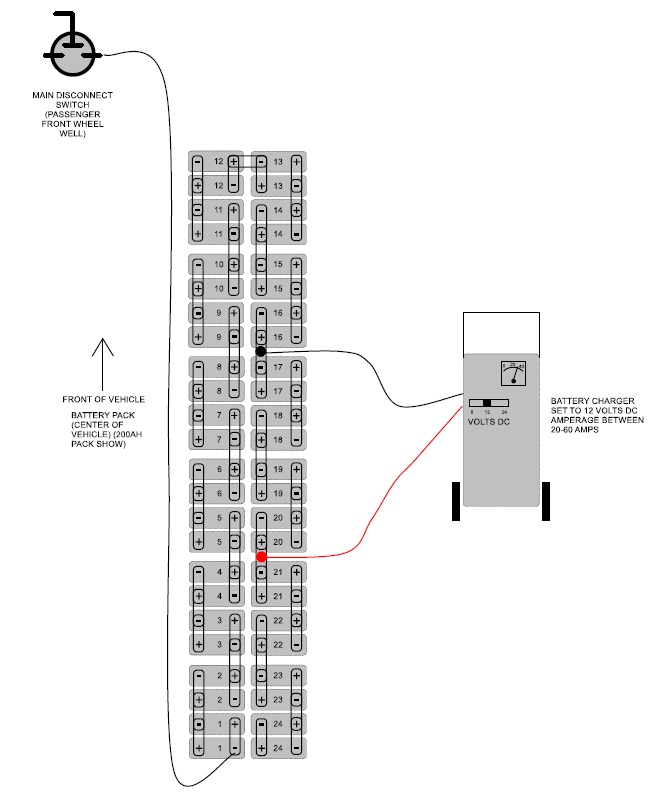
Start with negative clamp of 12-volt battery charger connected to the negative post of cell #1 as shown below. It takes very little energy to get the cells to above 2 volts. Some cases the battery charger will just need to operate for 30-60 seconds. Will vary depending on your current cell voltage and the amperage the charger is operating at. You must monitor each individual cells voltage while charger is on. Make sure that no cell every rise above 3.8 volts. In the event a cell does not take a charge its voltage can rise rapidly. Voltages above 3.8 can result in a cell starting on fire. If you have the lithium diagnostic cable and a computer, you can monitor the cell voltages that way as well. It would be the easiest and recommended way to do it. In order to monitor it with the diagnostics tool the front charge inlet must be plugged in in order for the BMS to power up.
Connect clamps as shown below then turn battery charger on.
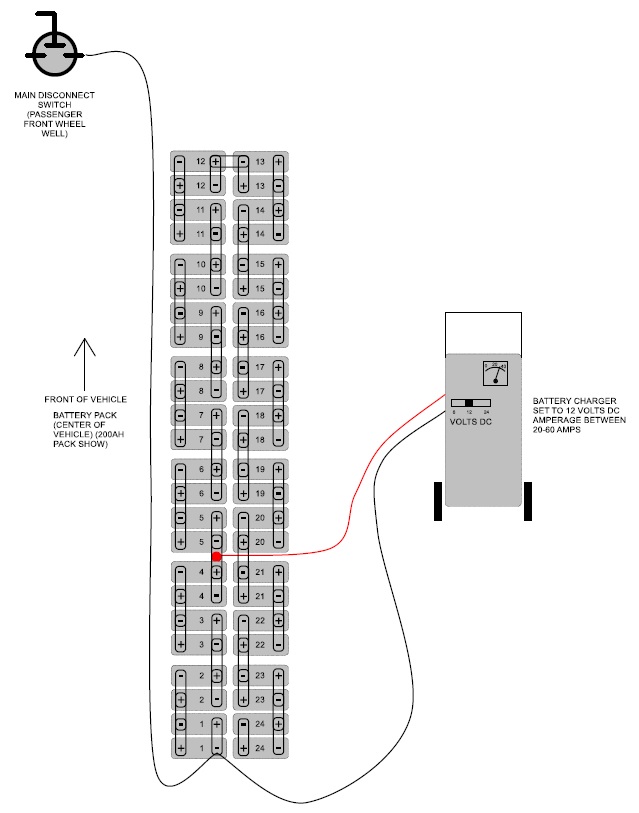
After cells 1-4 are above the 2 volts turn charger off and move charge clamps as shown below and turn charge back on.
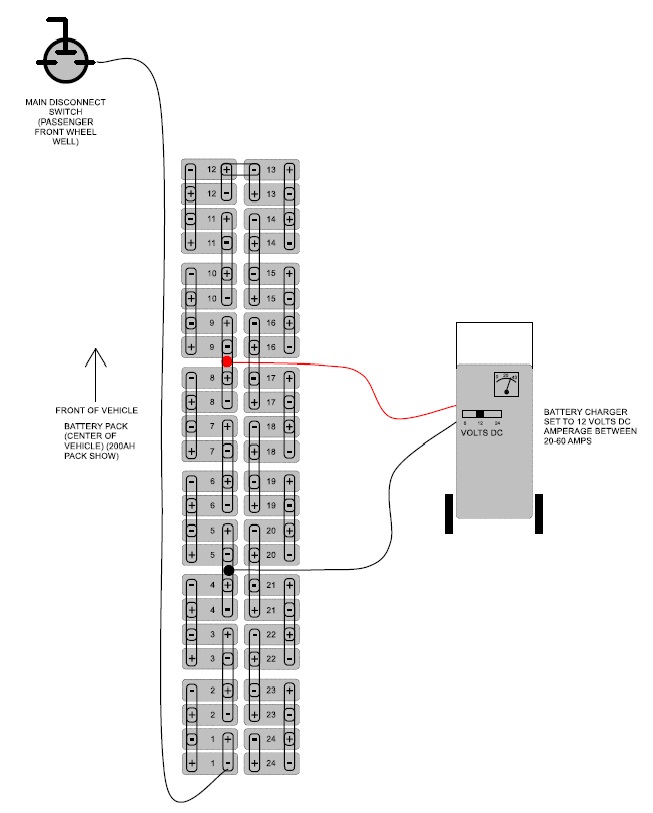
After cells 5-8 are above the 2 volts turn charger off and move charge clamps as shown below and turn charge back on.
After cells 9-12 are above the 2 volts turn charger off and move charge clamps as shown below and turn charge back on.
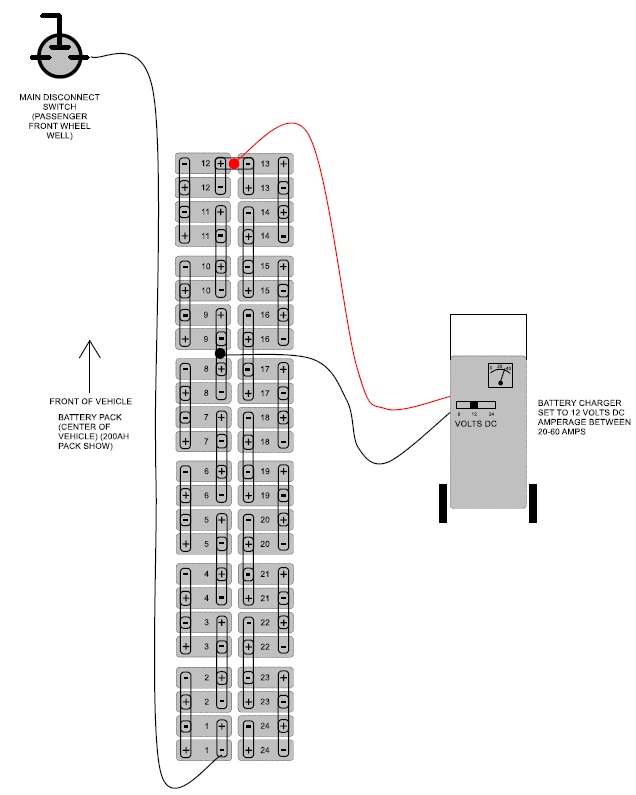
After cells 13-16 are above the 2 volts turn charger off and move charge clamps as shown below and turn charge back on.
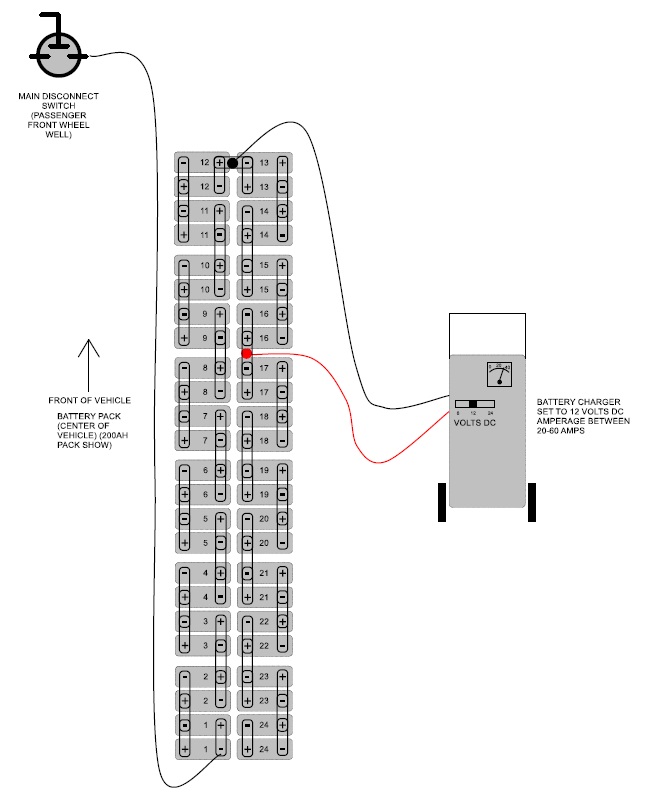
After cells 17-20 are above the 2 volts turn charger off and move charge clamps as shown below and turn charge back on.
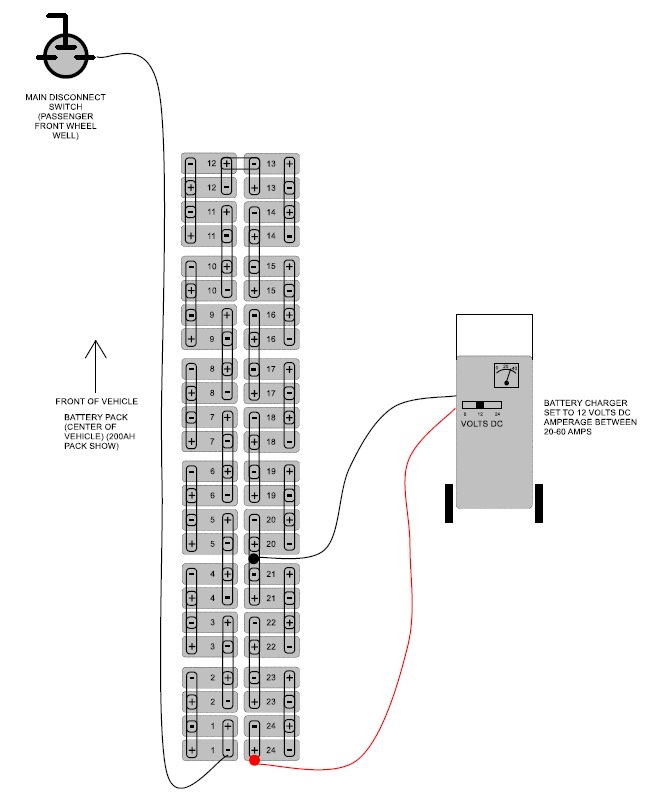
After cells 20-24 are above the 2 volts turn charger off and remove clamps.
If the lithium cells hold the charge or at least remain above the 1/2 volt BMS threshold the BMS should allow the charger to turn on. So go head and turn main disconnect back on if it was turned off and them plug in AC power to the front charging port. If the diagnostic computer is still connected you can go to file and restart BMS instead of unplugging and plugging back in the charge cord. If asked for password enter 9139.
If main battery charger turns on let it charge up completely. Note it is harmful to lithium cells to drop below 2.5 volts. The longer it sits this low the harder it is on them. In this case the cell will not hold a charge and you need to replace that single cell or consider entire pack replacement depending on its life remaining.