Drive System/'s
ALL DrivesBattery Type/'s
-Lithum 100AH 3.3KW Charger-Lithum 200AH 3.3KW Charger
-Lithum 100AH 6.6KW Charger
-Lithum 200AH 3.3KW Charger
HVAC System/'s
All HVACManufacture Dates
Between 09/24/2012 Thru 11/29/2016
Shut off the main battery disconnect located in the front right wheel well. Also make sure front battery charger inlet plug is disconnected from the main power grid.
How to access and remove the
charger:
(Excluding
Air Conditioner equipped vehicles)
In order to
access the battery charger the front hood needs to be opened and the tunnel
cover in the center needs to be lifted open. The battery charger is the black
box located on the passenger’s side of the tunnel. A way to know it’s the
charger the center of it has a fan attached to it. Removal of charger consists
of unplugging the three connectors. AC plug, DC plug and CANBUS plug. Note that
the CANBUS external box is to be removed and discarded as well unless you have
other older lithium vehicles than the CANBUS external box may be kept for
future repairs. Unbolt charger and remove.
Air Conditioner equipped vehicles:
In order to access the battery charger for air conditioned equipped vehicles you will need to go under the rear of the vehicle. Behind the rear axle you will see a large aluminum tray. The charger will be mounted to the top of this tray. A way to know it’s the charger the center of it has a fan attached to it. Removal of charger consists of unplugging the three connectors. AC plug, DC plug and CANBUS plug. Note that the CANBUS external box is to be removed and discarded as well unless you have other older lithium vehicles than the CANBUS external box may be kept for future repairs. Unbolt charger and remove.
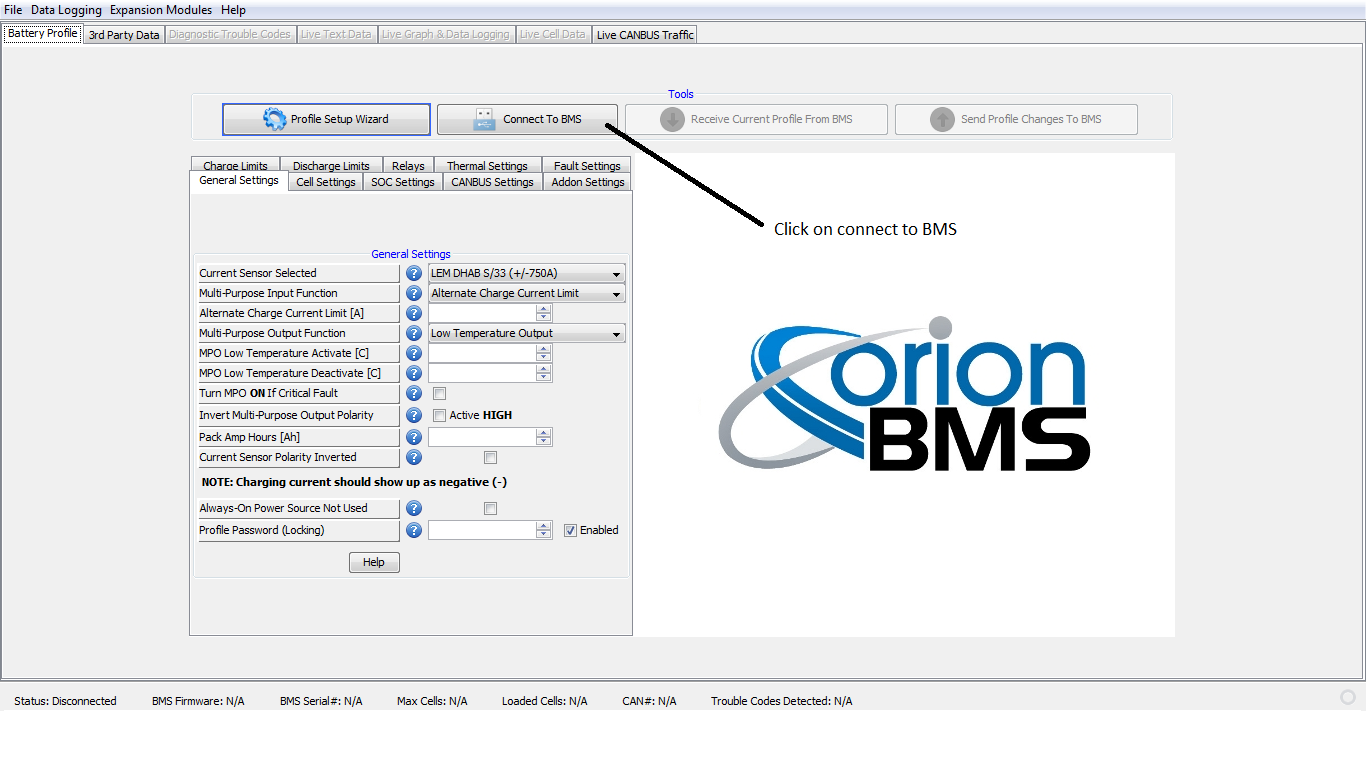
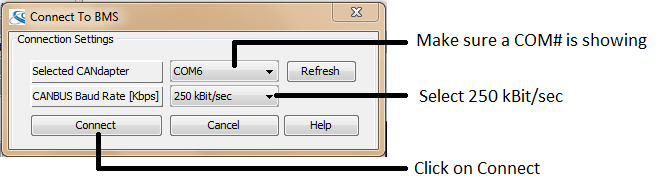
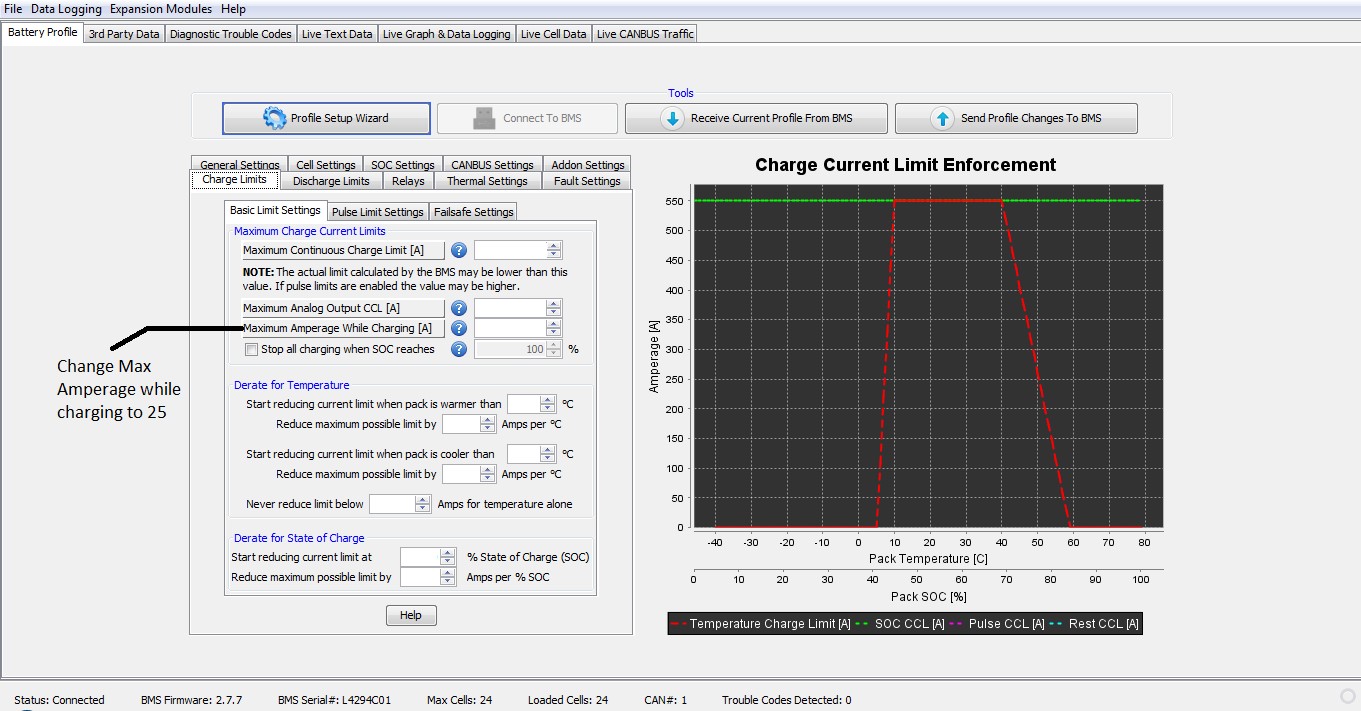
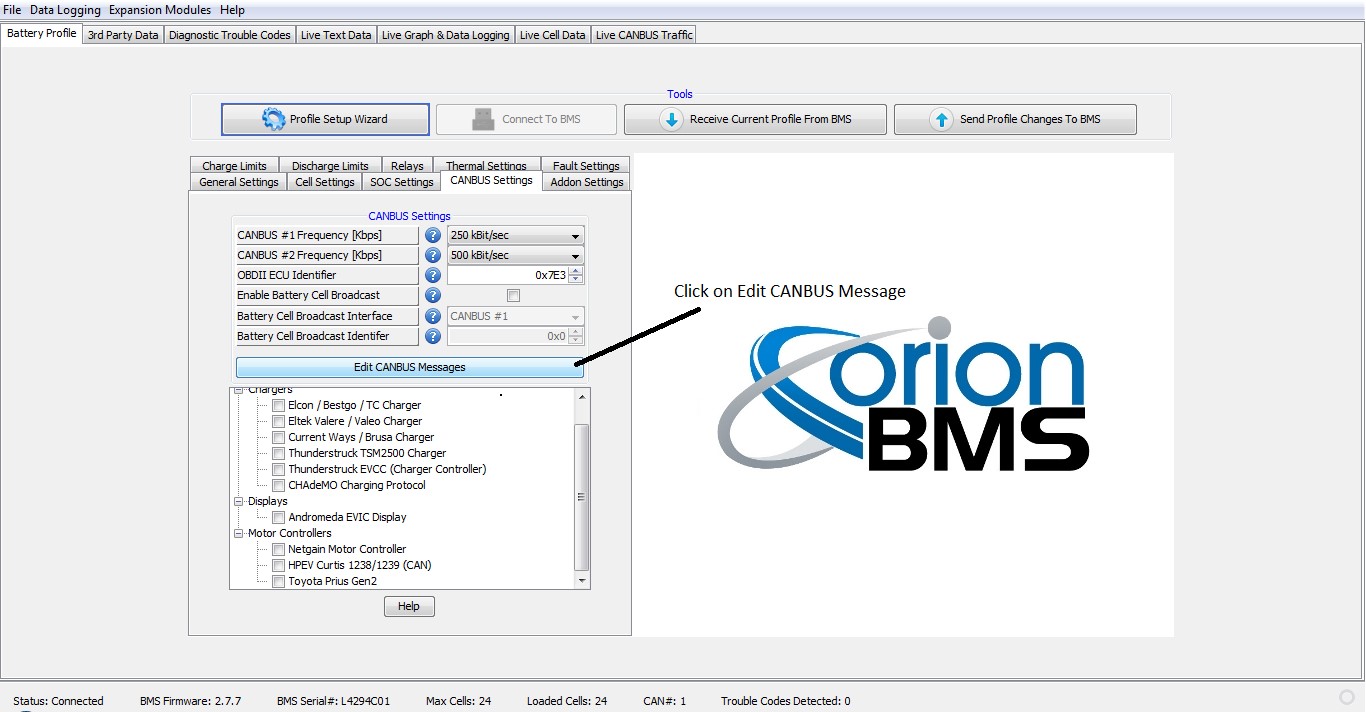
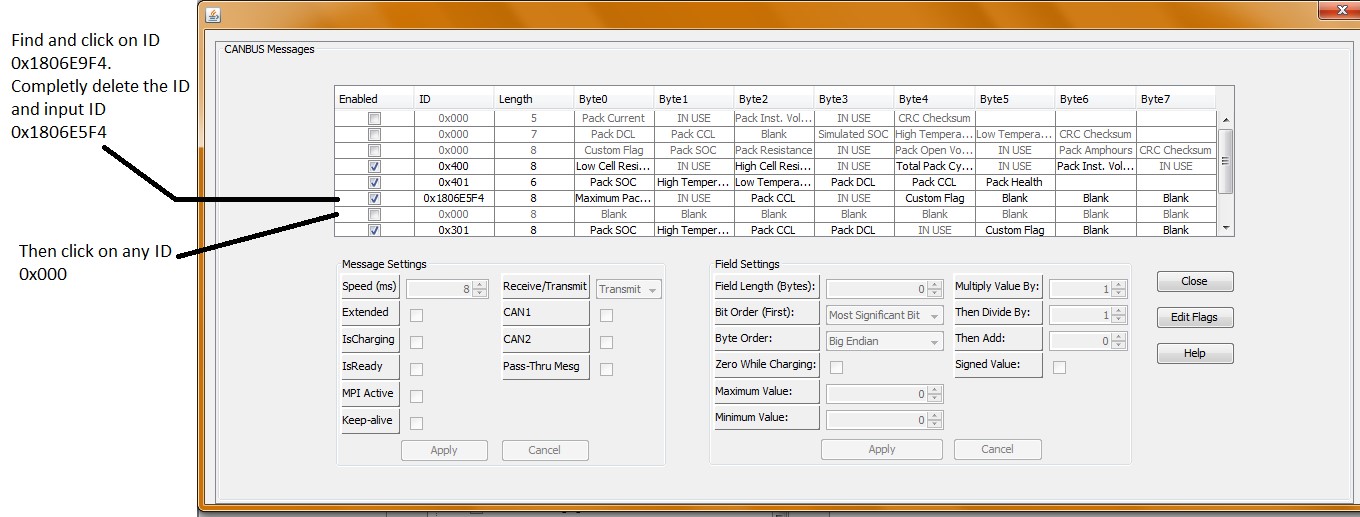
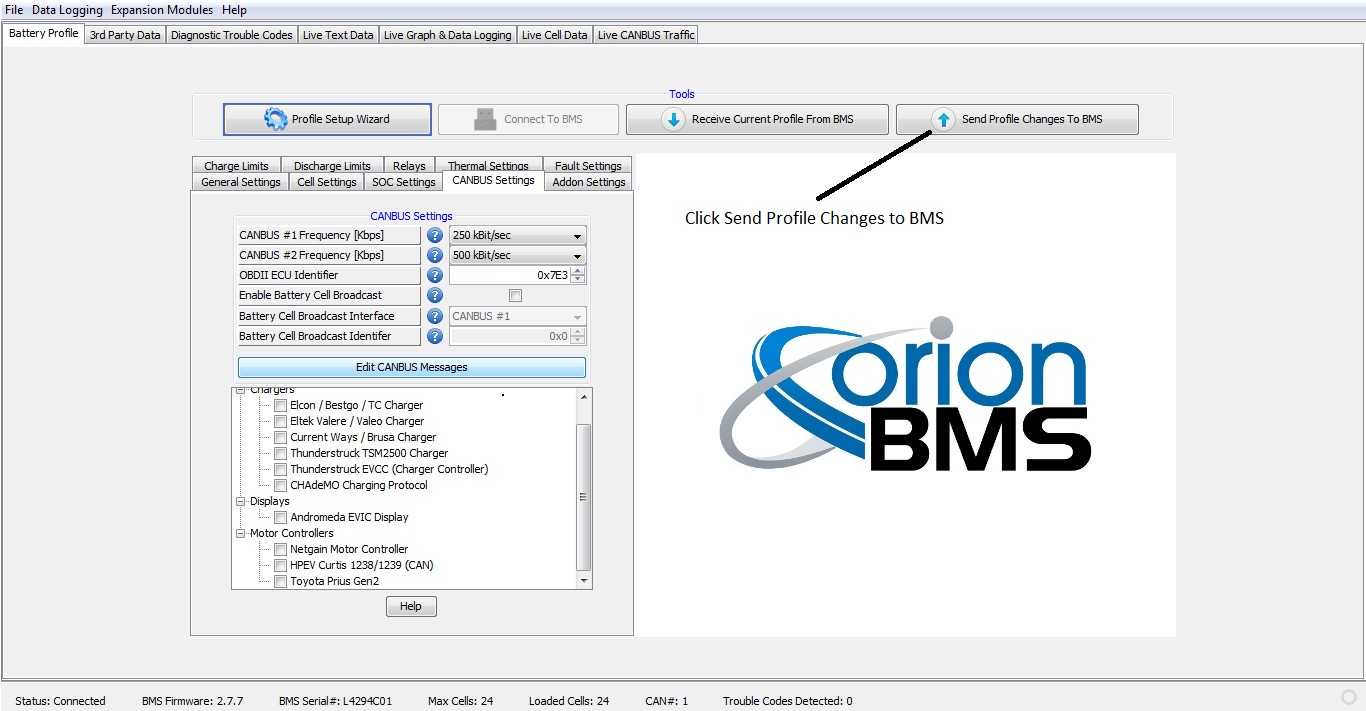
Reprogramming BMS for new
charger
The BMS must have the program parameters adjusted in order for the charger to turn on and charge. To do so this will require your own computer and e-ride programming cables part# U5665A & U5666A. The program cable will plug into the black connector located just above the accelerator pedal. This type of connector is referred to as an OBDII connector. Plug the other end of the cable into the USB port of your computer. Plugin the vehicle just as if you were going to re-charge it. Open up computer program labeled Orion BMS utility and follow these steps.
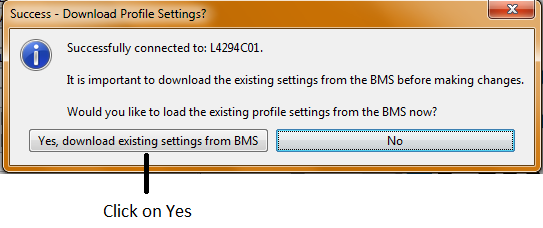

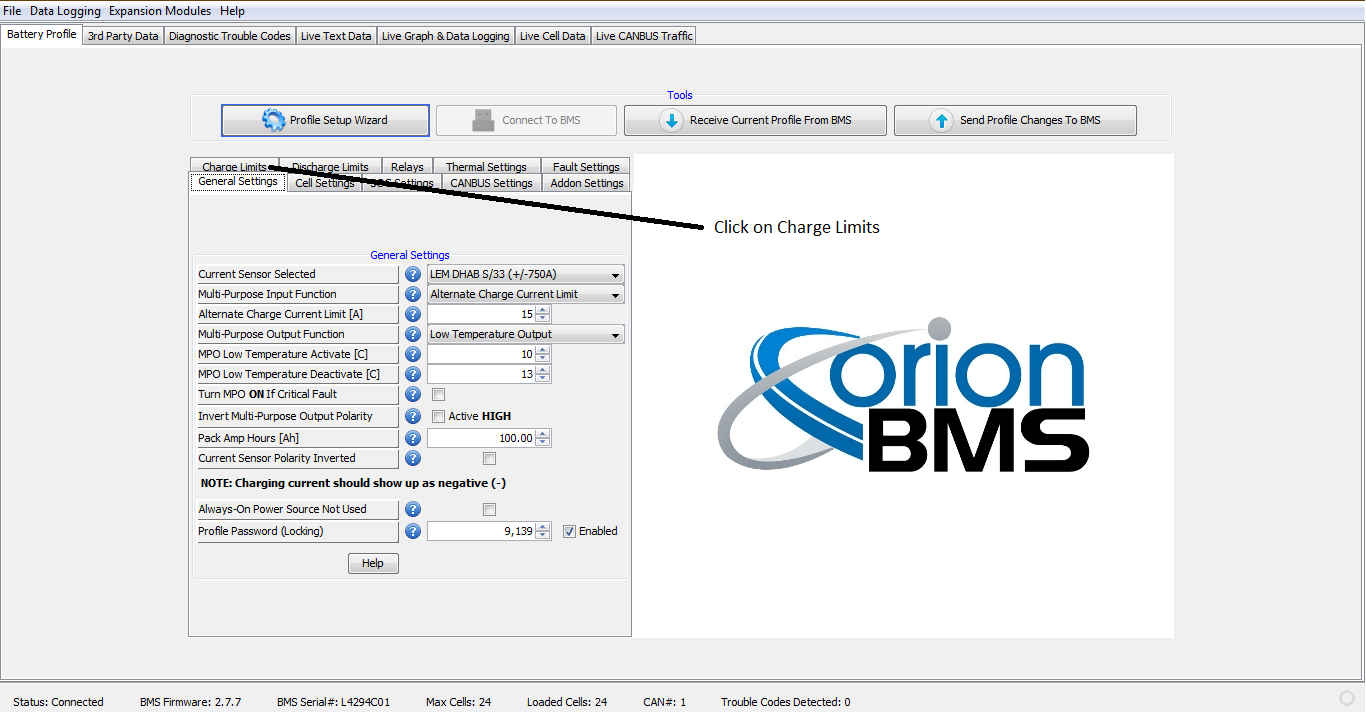

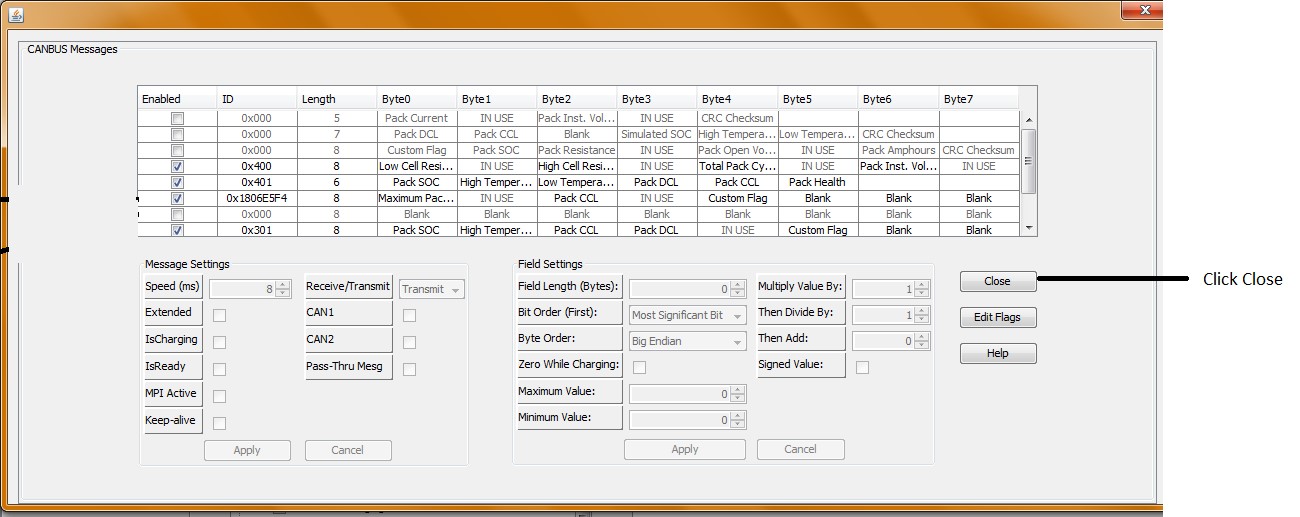
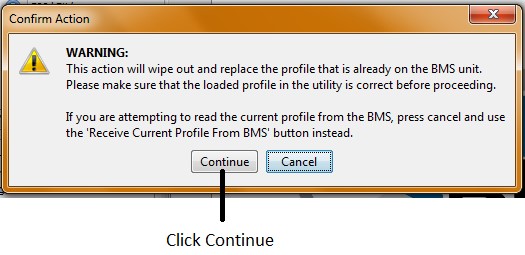
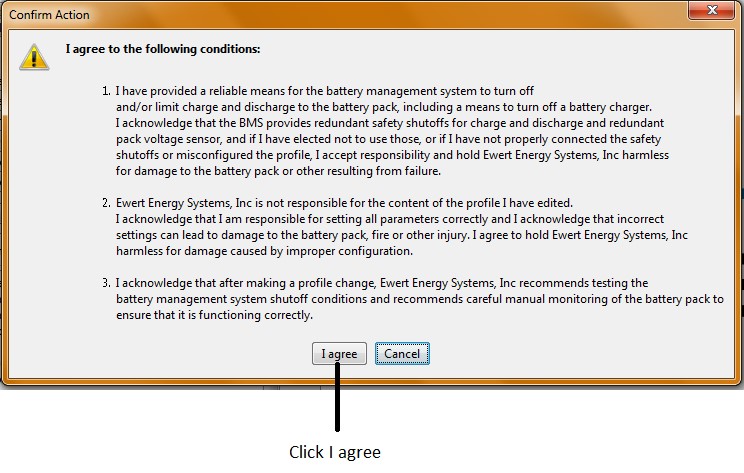
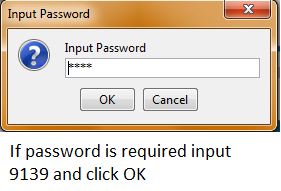
Program will load and will show
that it was successfully loaded. Turn on main battery disconnect switch if not
done so already. Vehicle should be charging. You can confirm this by opening
the tab labeled live cell data. The pack current should show a negative number
such as -15 or -25 depending on the AC voltage being used to recharge the
vehicle.